Porsche 997.1 Carrera 3.6L 3.8L 05-08 Catback Installation
Posted by Top Speed Pro1 on 18th Apr 2024
Installation Instruction for : Porsche 997.1 Carrera 3.6L 3.8L 05-08 Cat-back Exhaust with Remote Valve
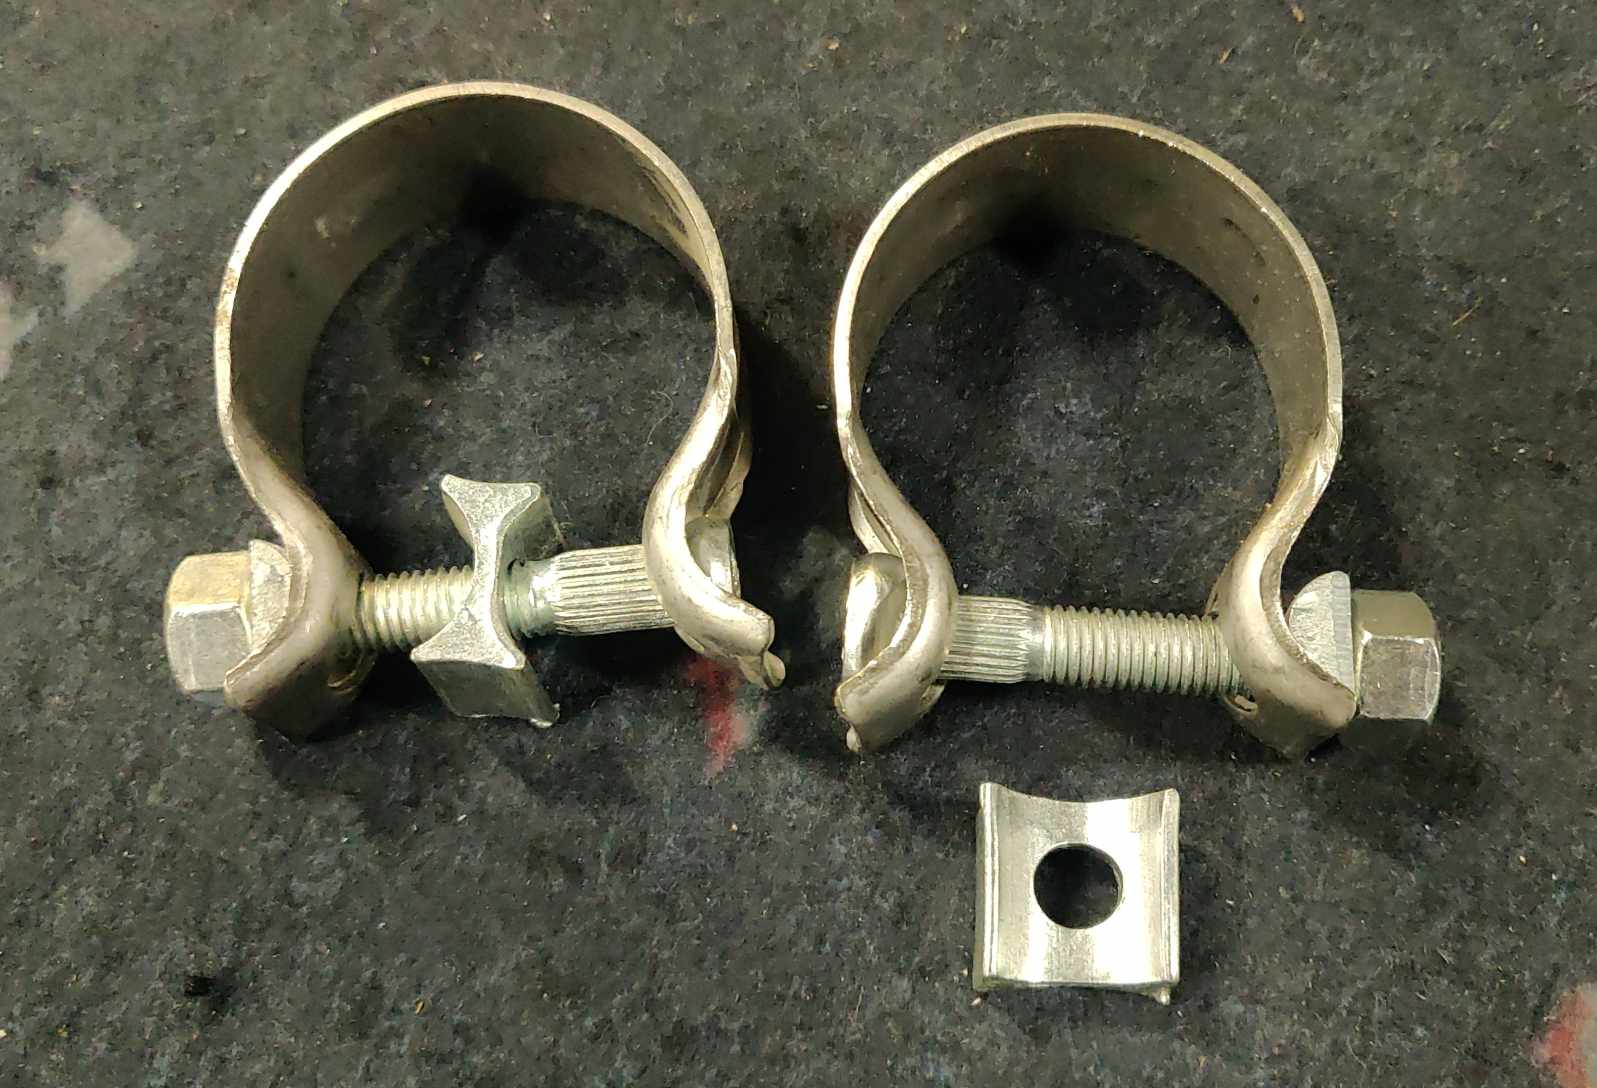
Picture 1, illustrates how the center divider in the middle of the bolt on the exhaust clamp can be removed to simplify the tightening process.
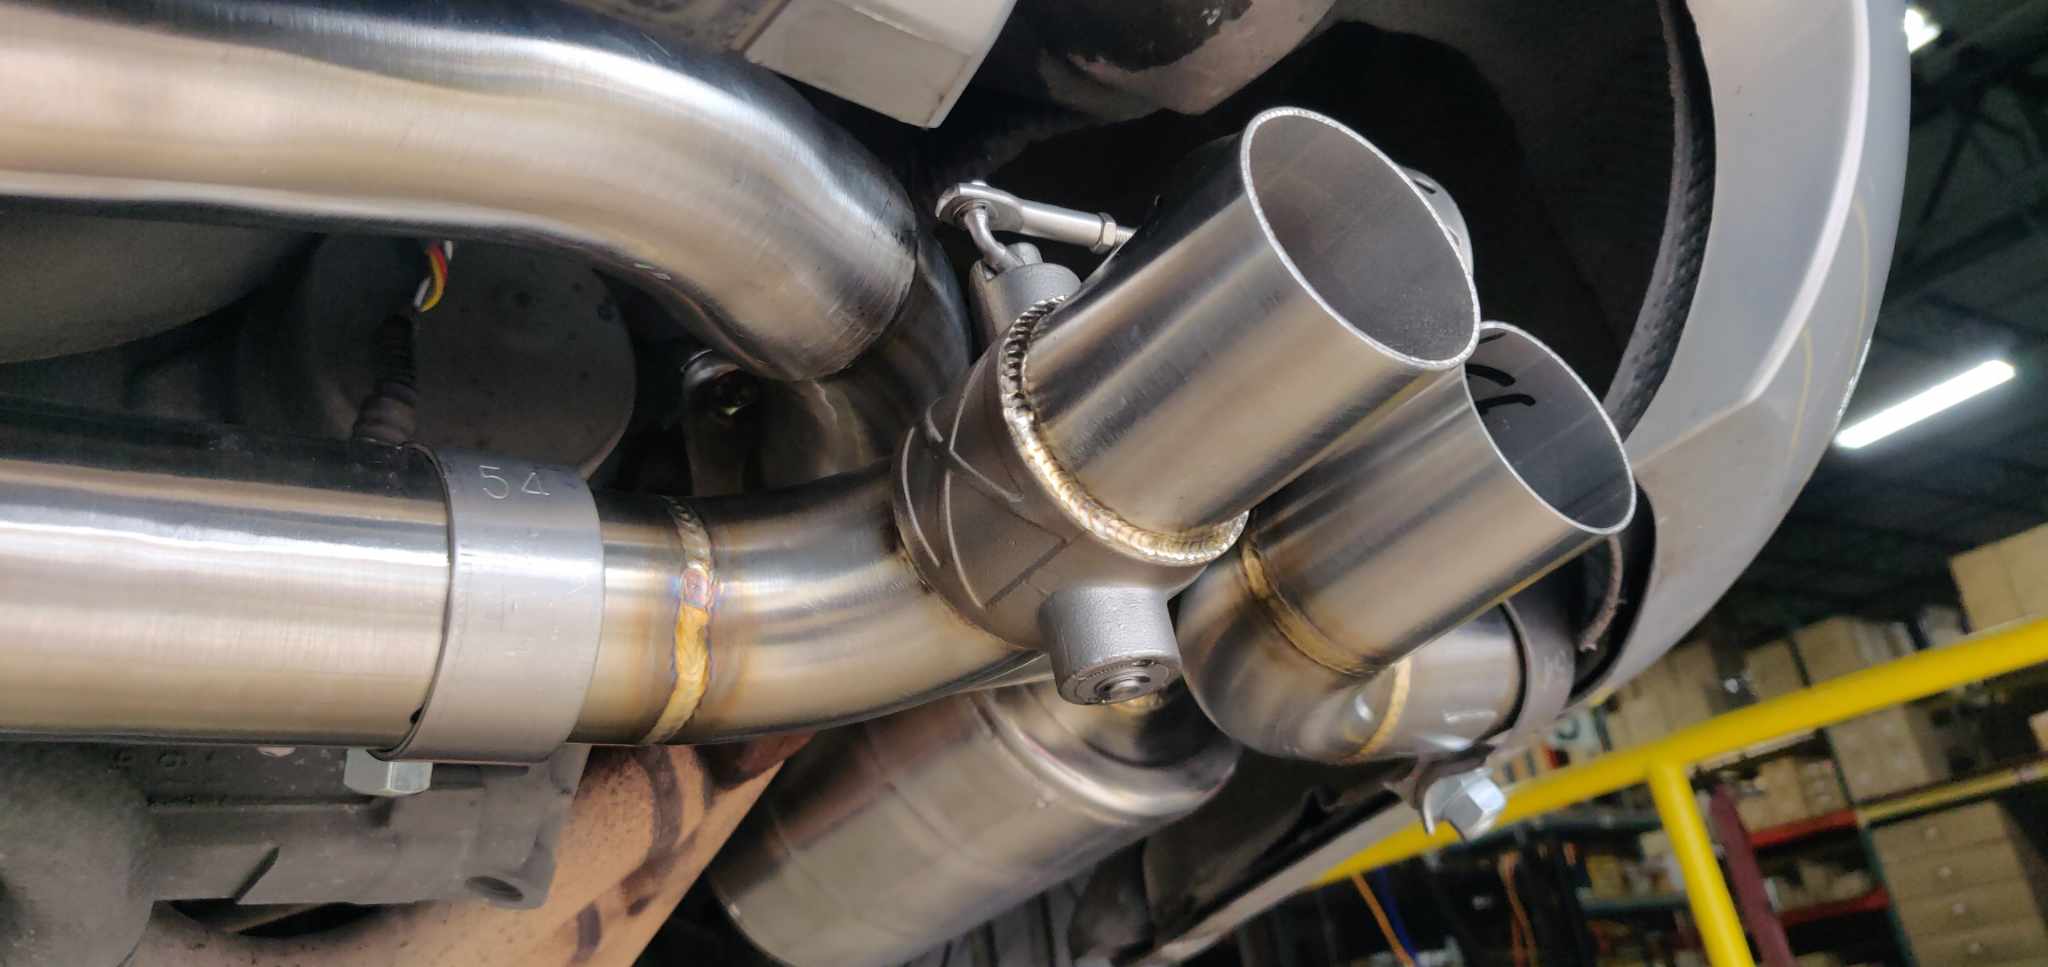
1. Begin by removing the factory exhaust from the vehicle. With the exhaust, you'll find 8 pieces of 54mm Exhaust Clamps included.
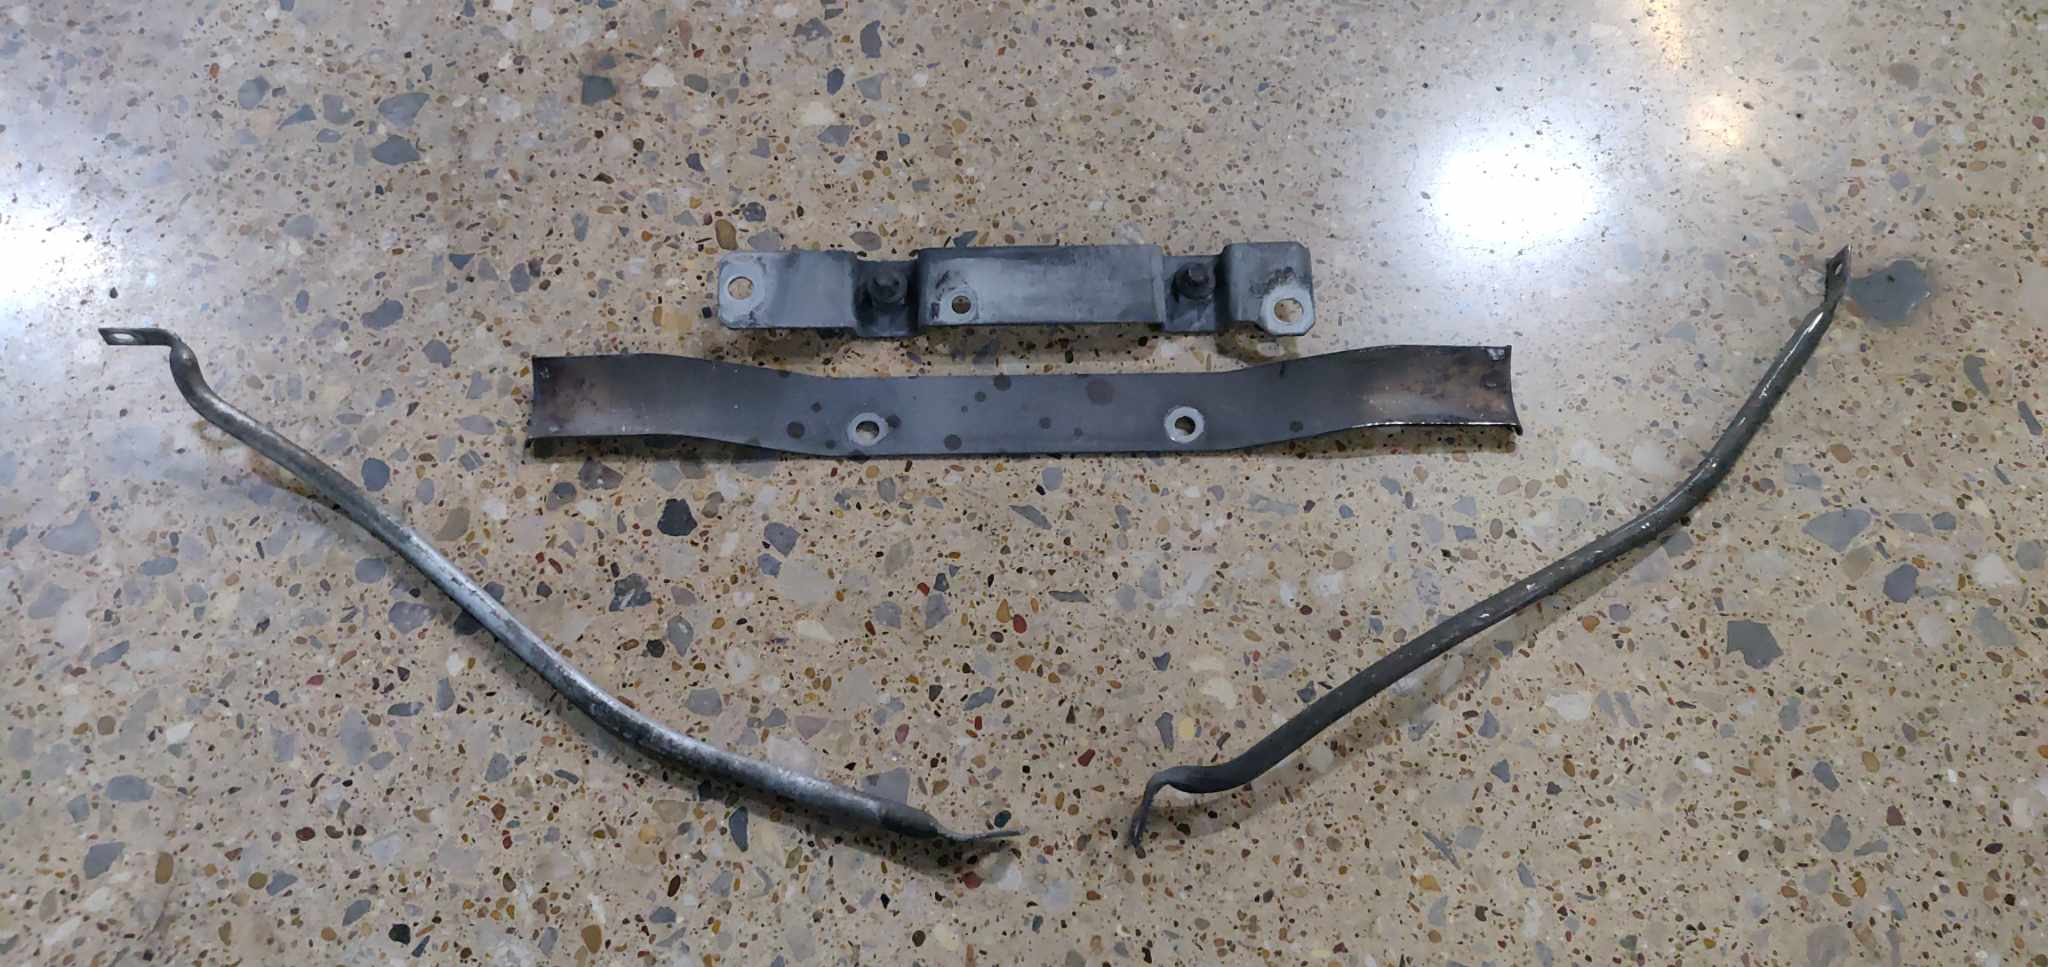
In Picture 2, it is depicted that these are original factory components that must be removed from the 997.1 to facilitate the installation of the new exhaust.
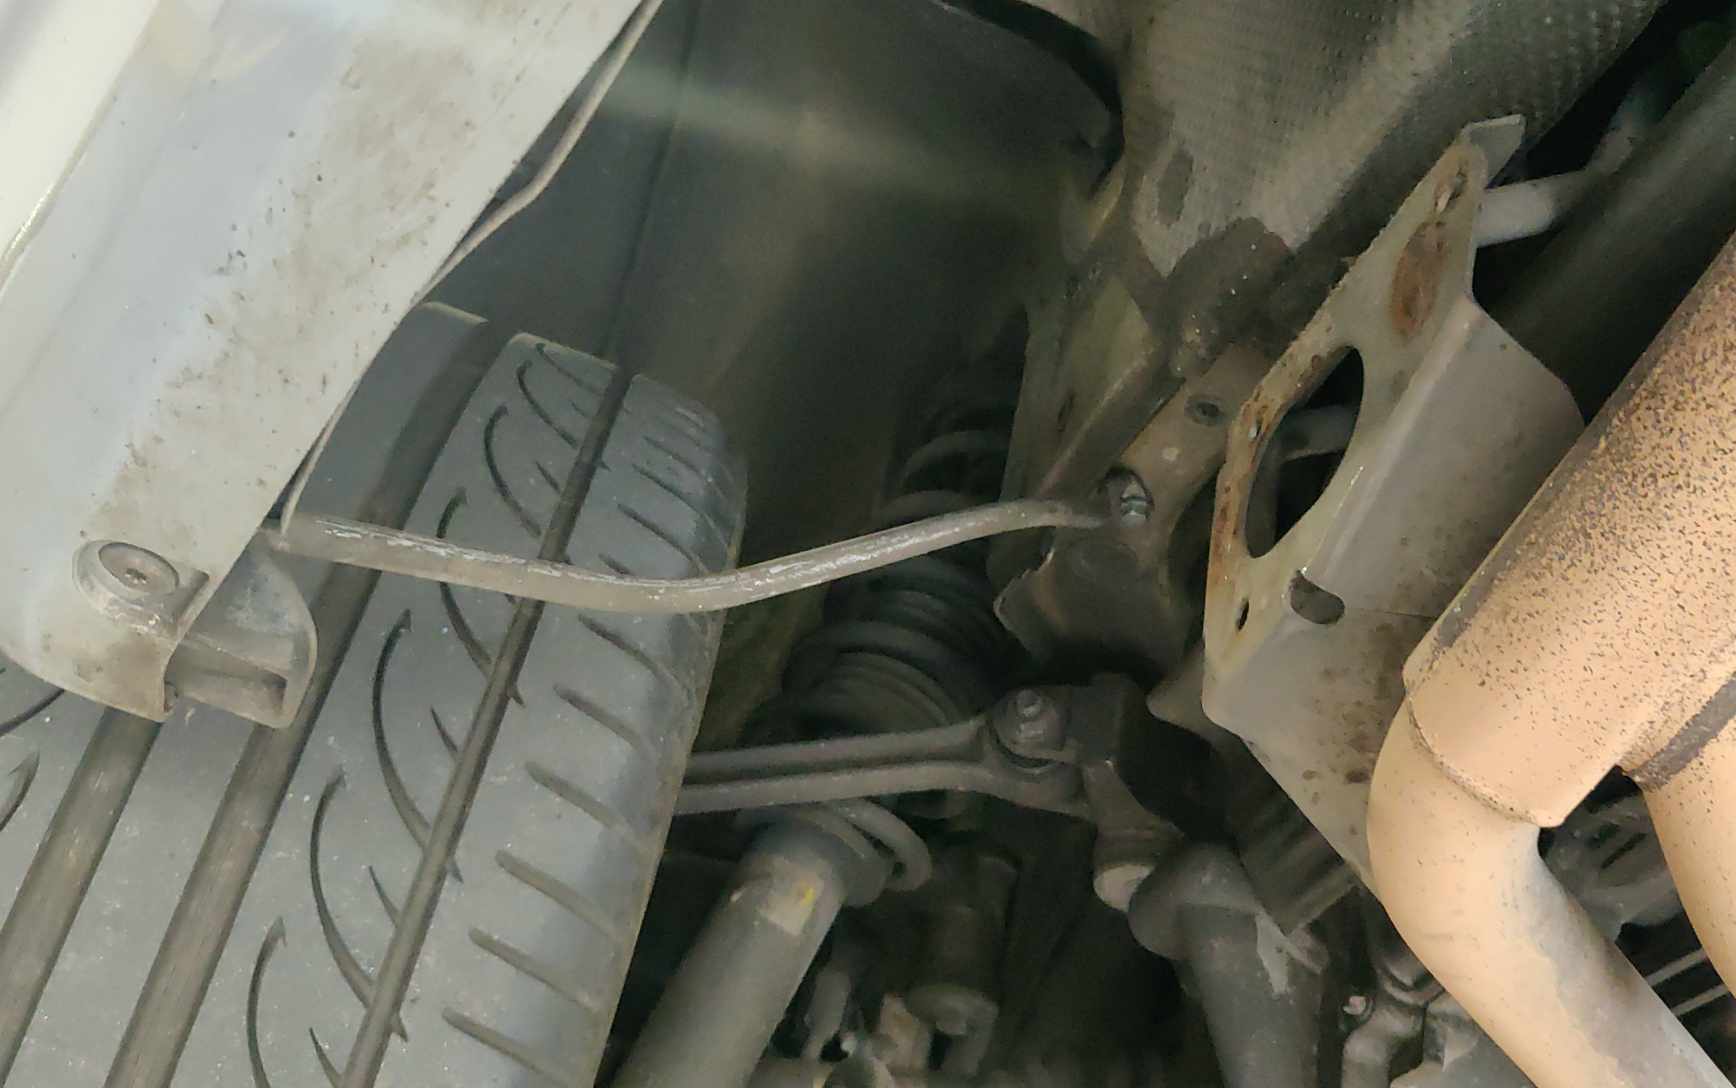
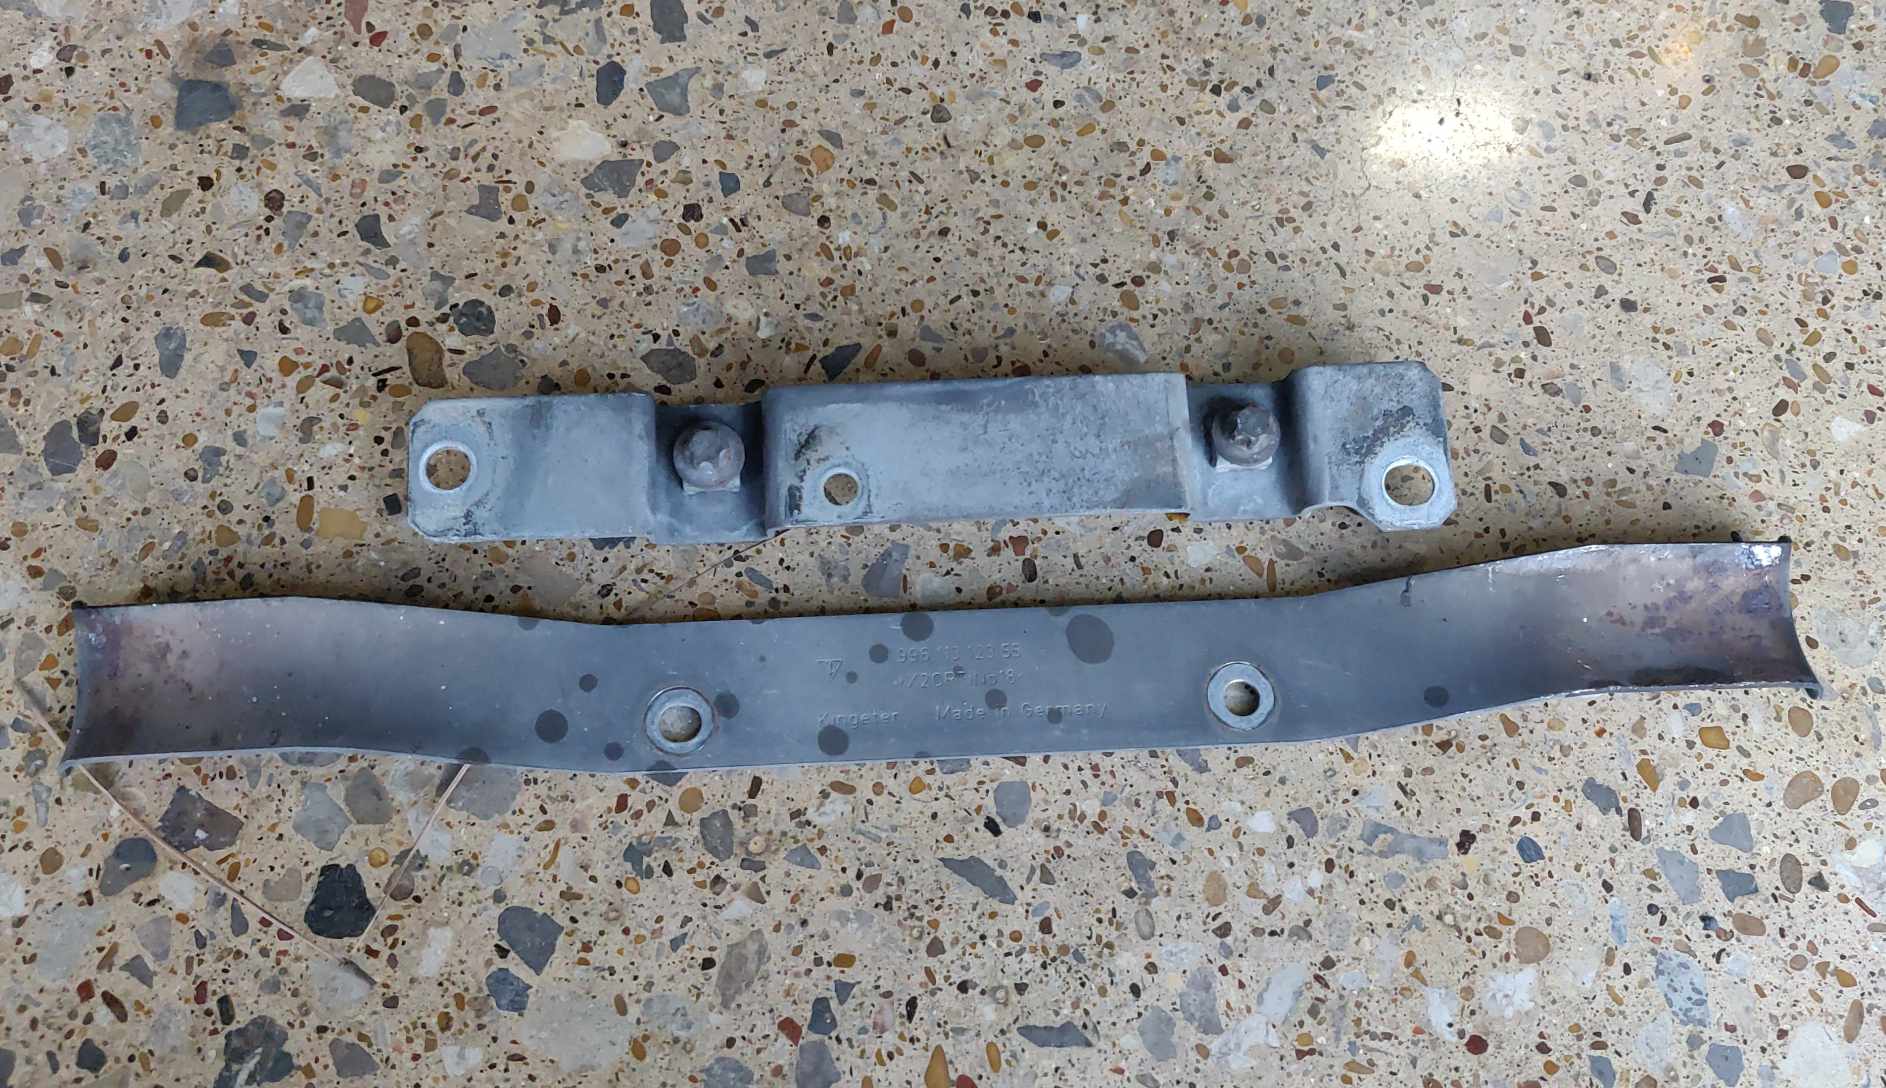
2. Remove the Factory hardware from the 997.1 to prepare for the installation of the new exhaust. This includes removing the Left and Right side Rear Bumper Spacing Support Brackets – picture3 (2 bolts per side requiring a 5/32 Male Torx and 10mm Socket), as well as the Factory Exhaust Center Bracket support –picture 4 overlap by 2 brackets with 5 x Bolts (requiring a 1 x 8mm Female Torx socket / 2 x 10mm Female Torx sockets / 2 x 15mm sockets). Removing these factory exhaust center brackets will allow an additional 2" spacing for exhaust pipe adjustment clearance.
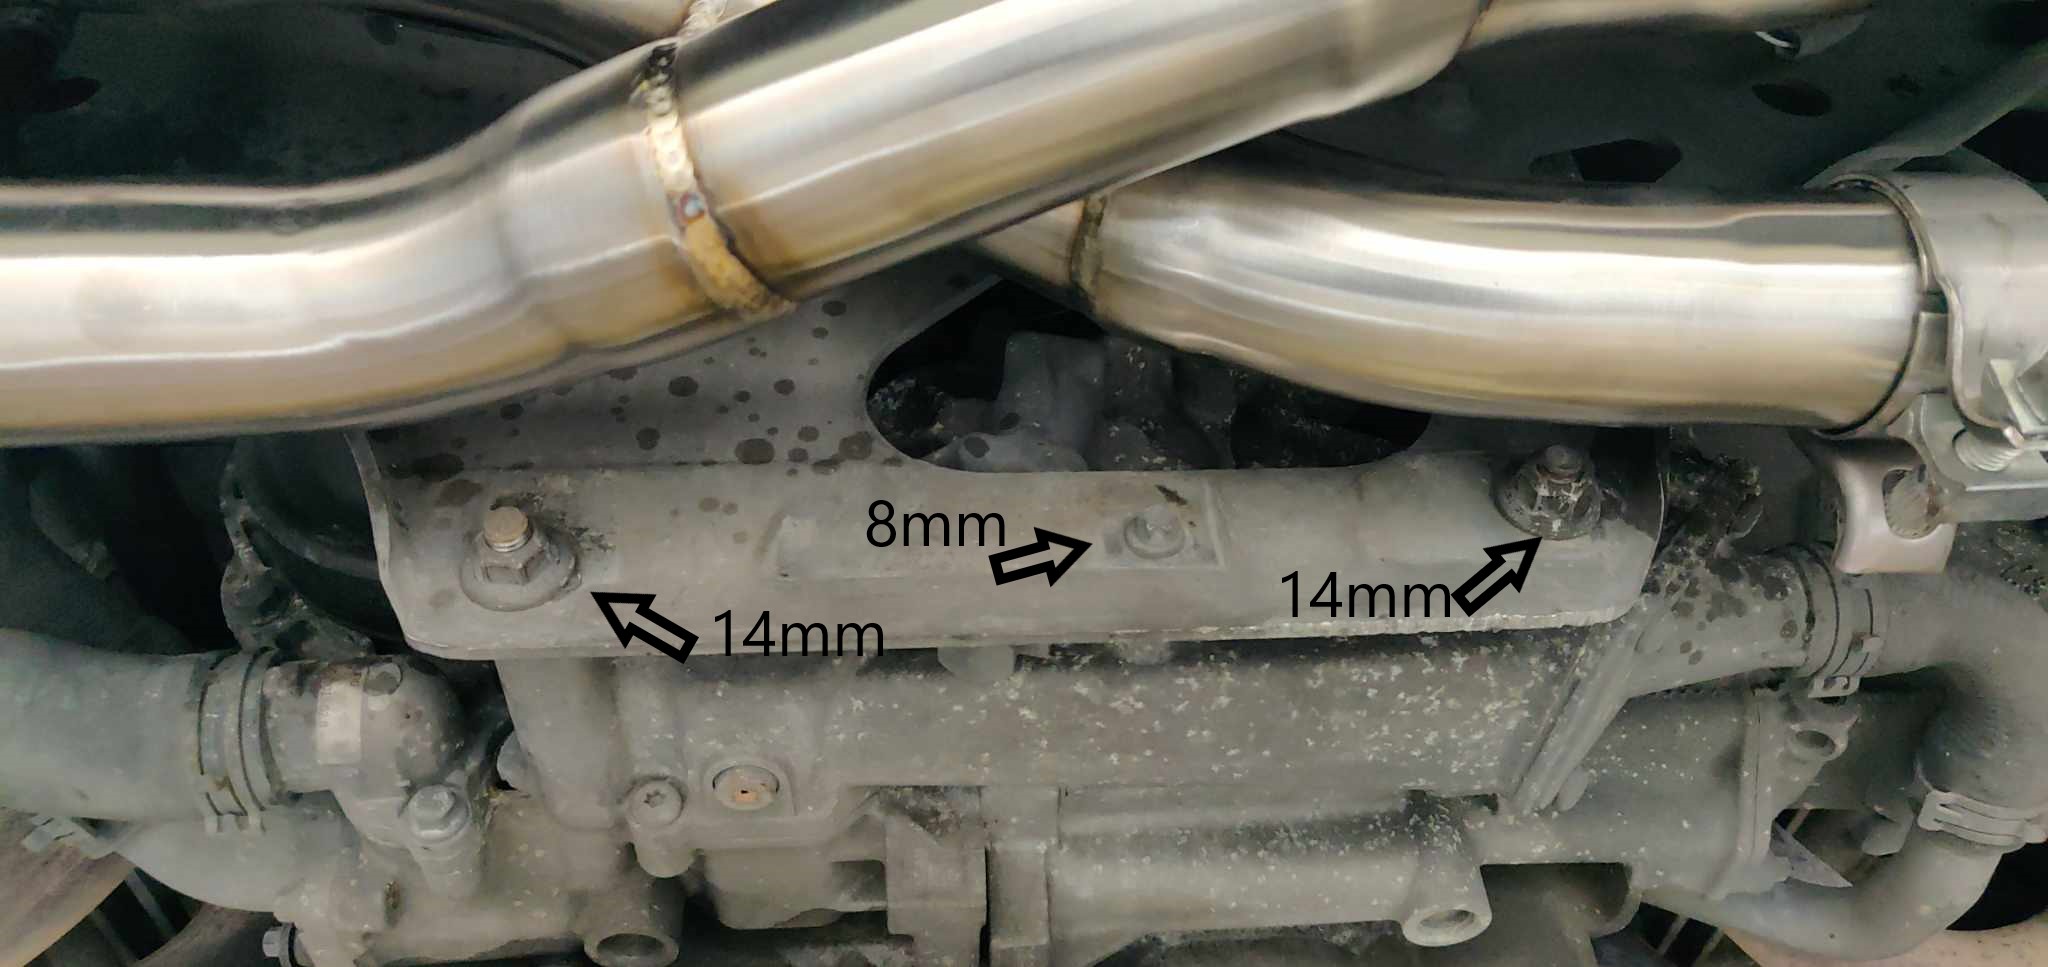
3. Reattach the 1 x 8mm Female Torx and 2 x 15mm socket bolts to the Main support Bracket, as demonstrated in the picture 5 above.

4. Connect all piping with clamps and insert bolts onto the flanges, but do not tighten them yet. Keep them loose for exhaust adjustment.
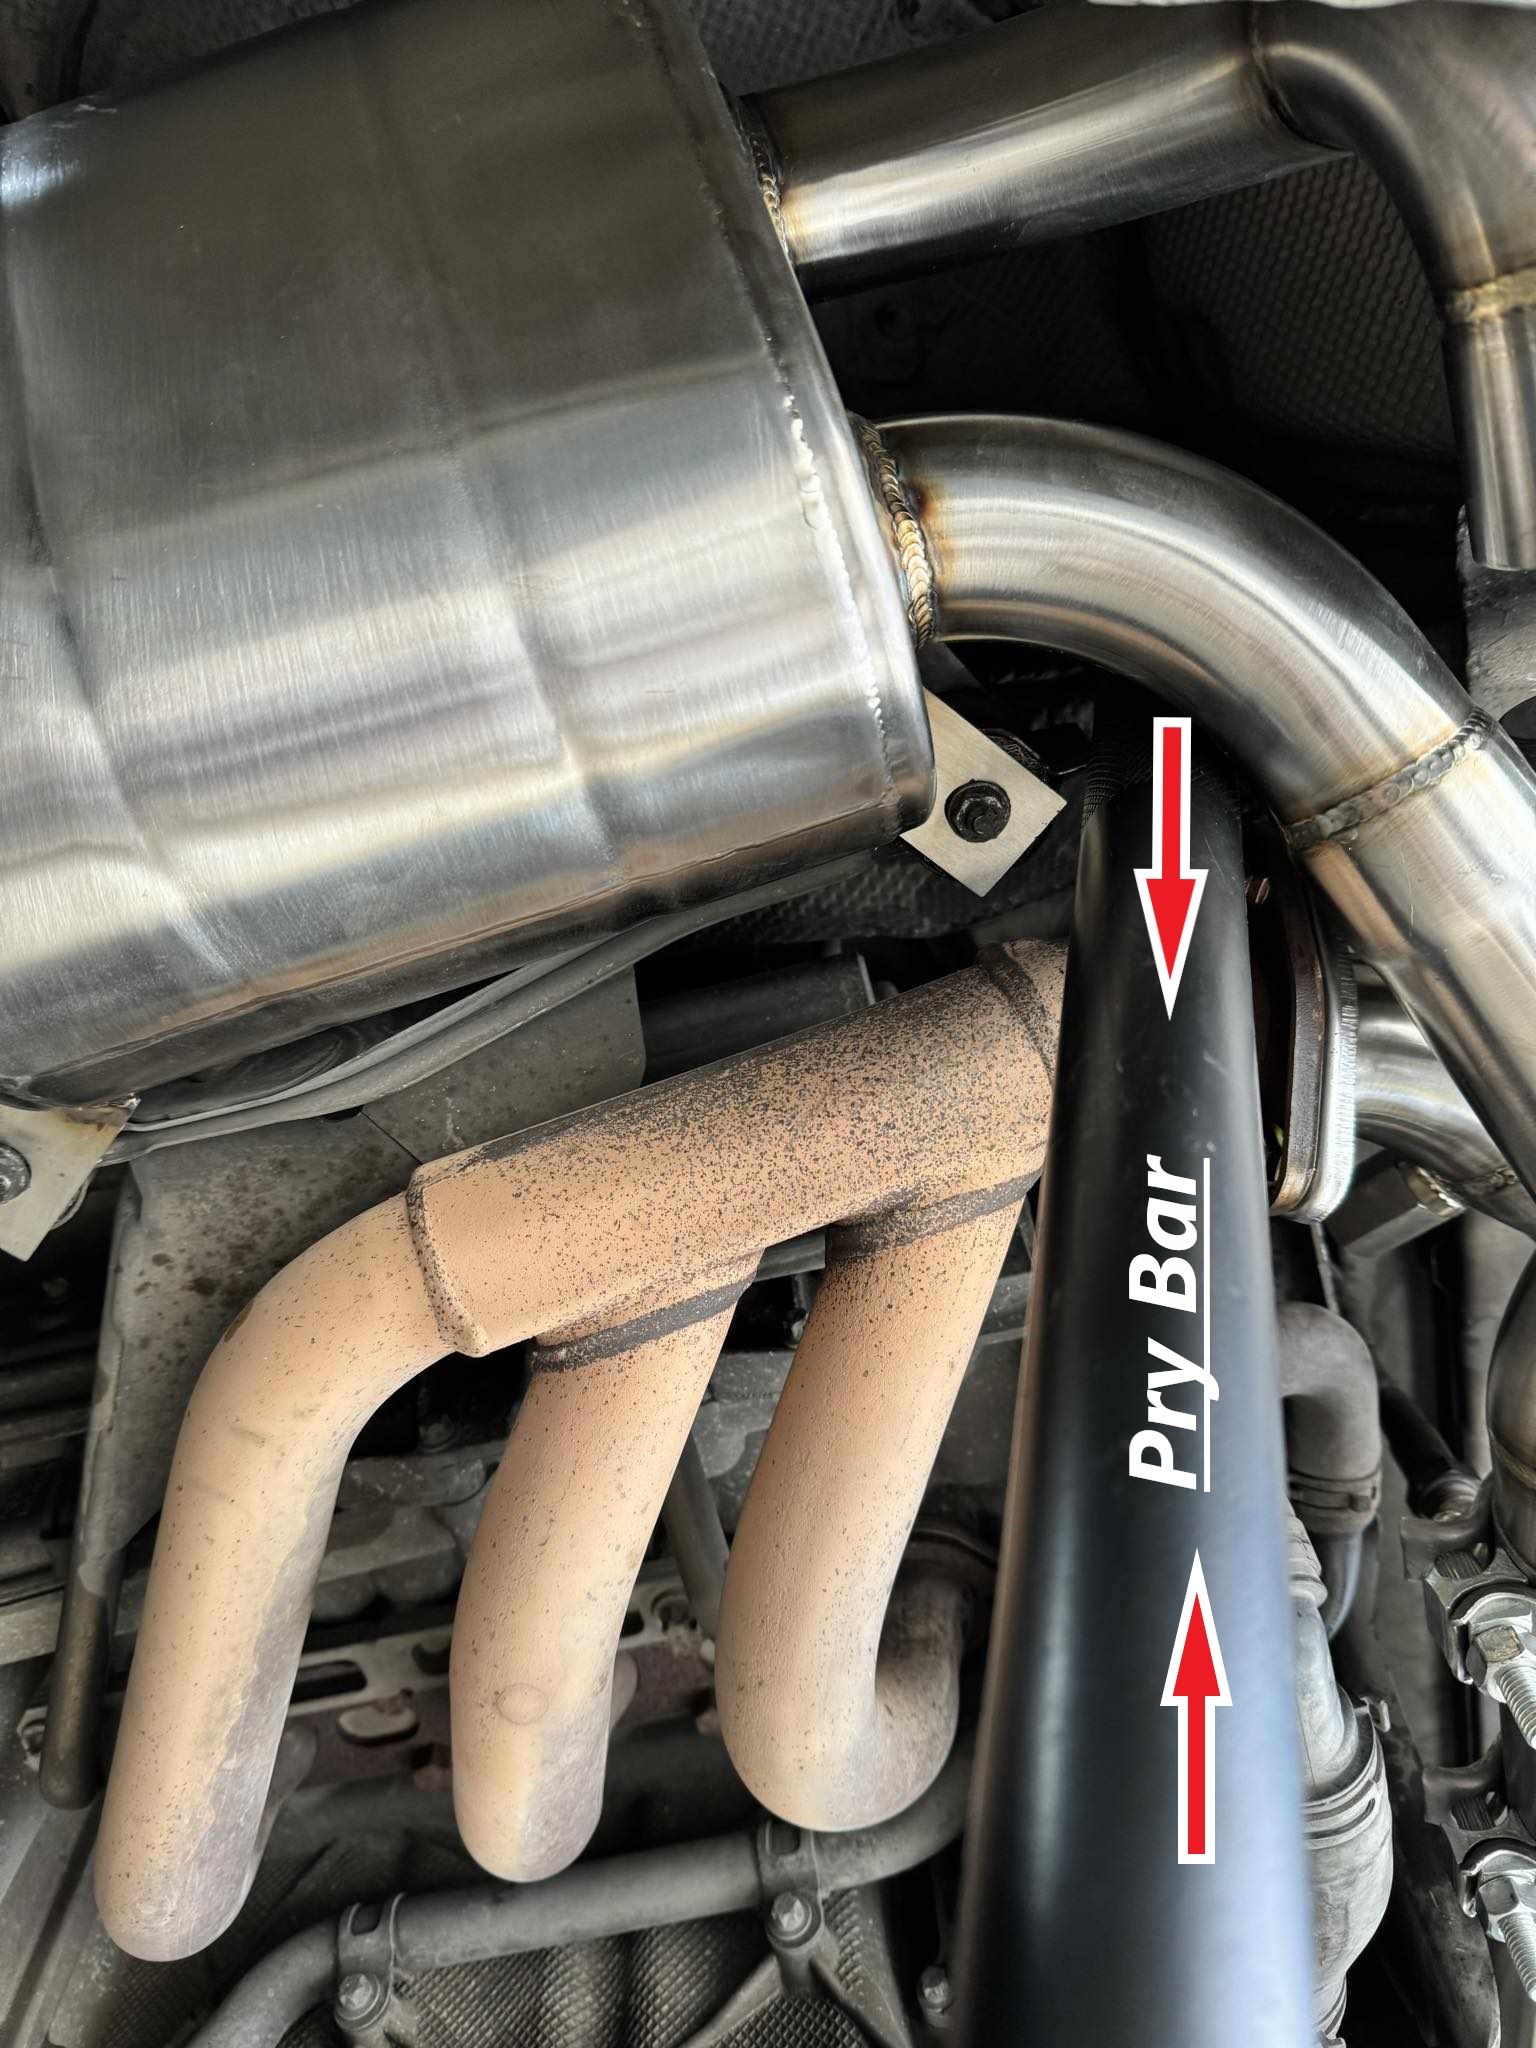
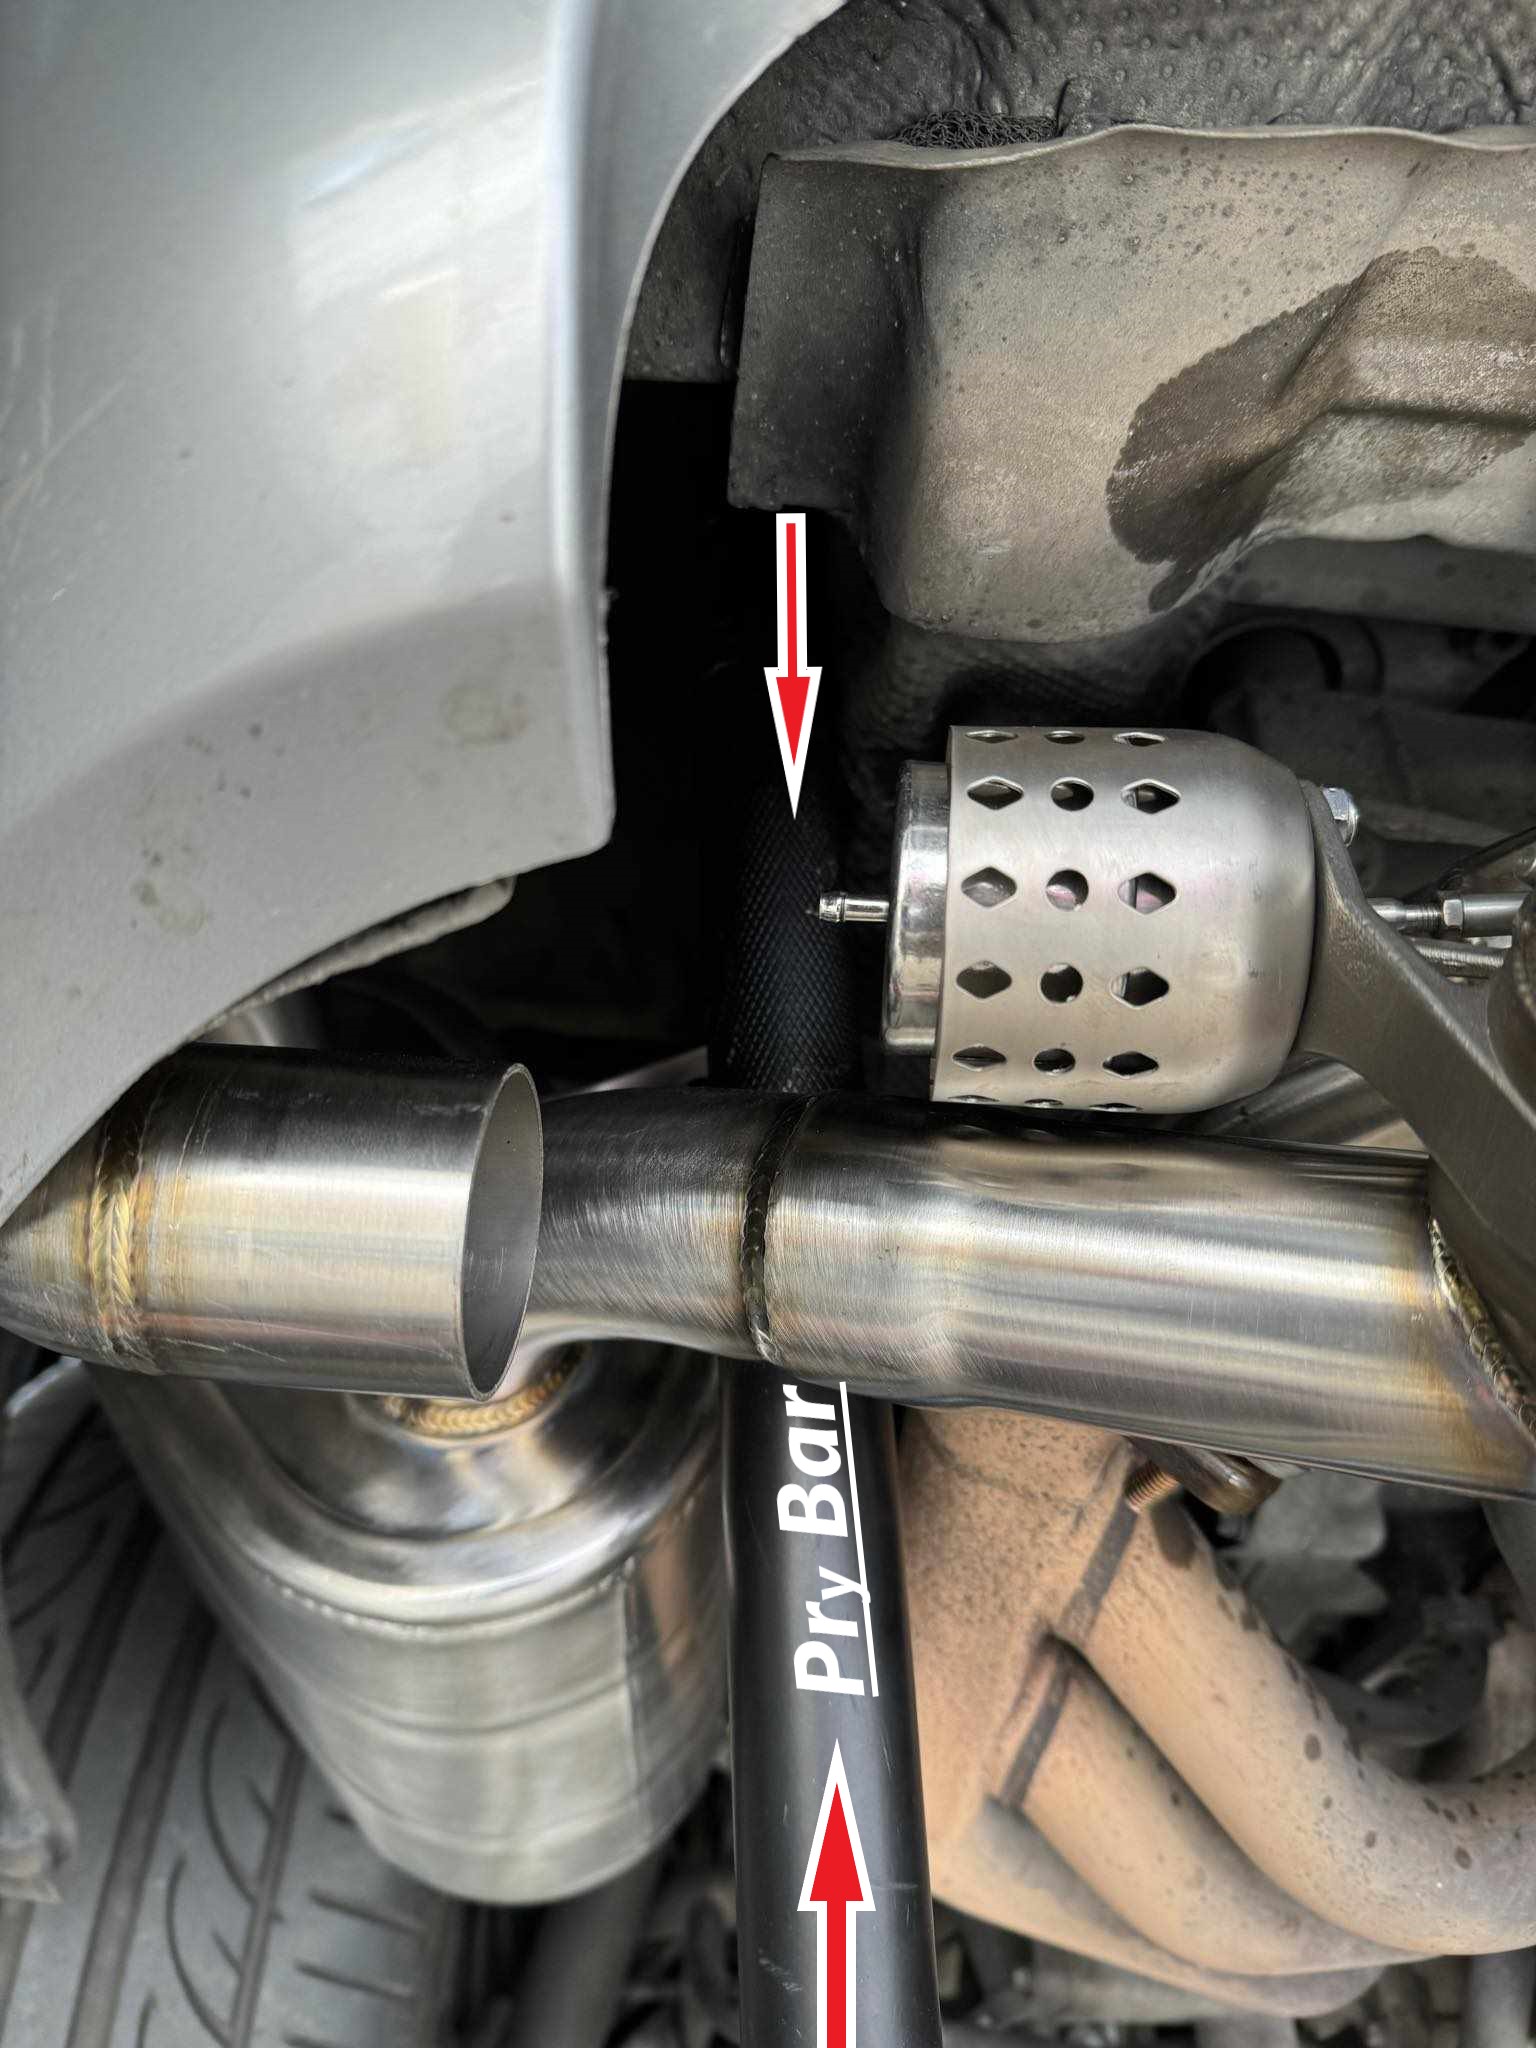
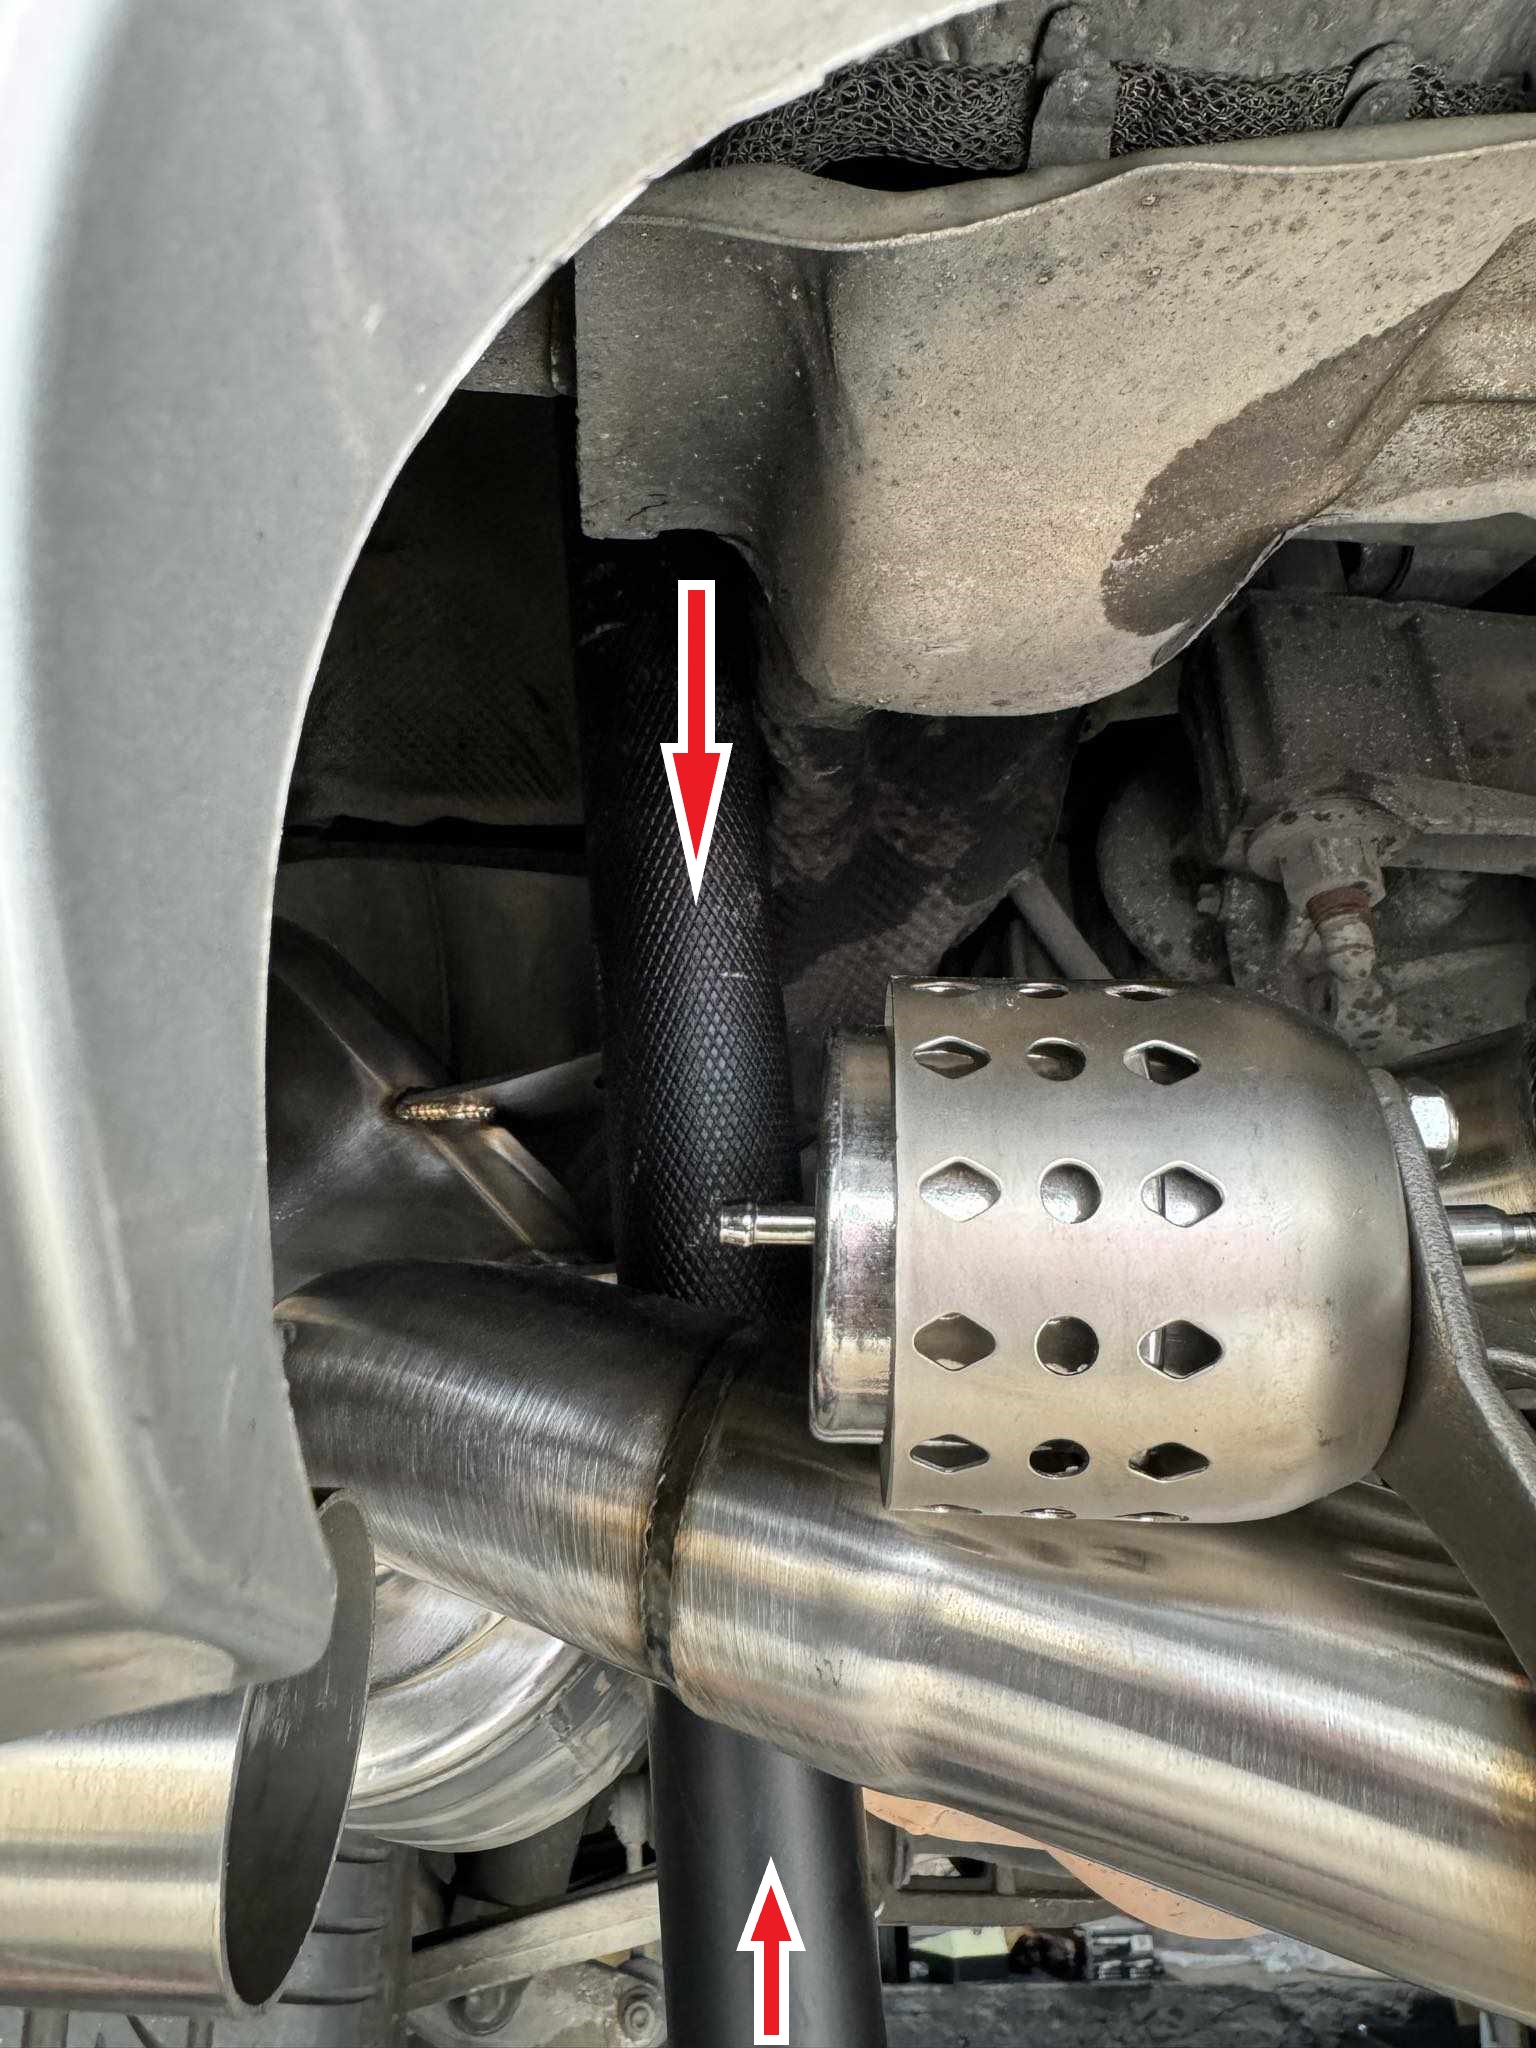
Utilizing a Pry Bar positioned between the header and exhaust piping, as demonstrated in the three pictures above.
5. Secure the muffler section bracket supports on both sides. Each side will require an extra person to assist with adjusting the exhaust valve to clear the exhaust piping by at least 1/4" for proper function.
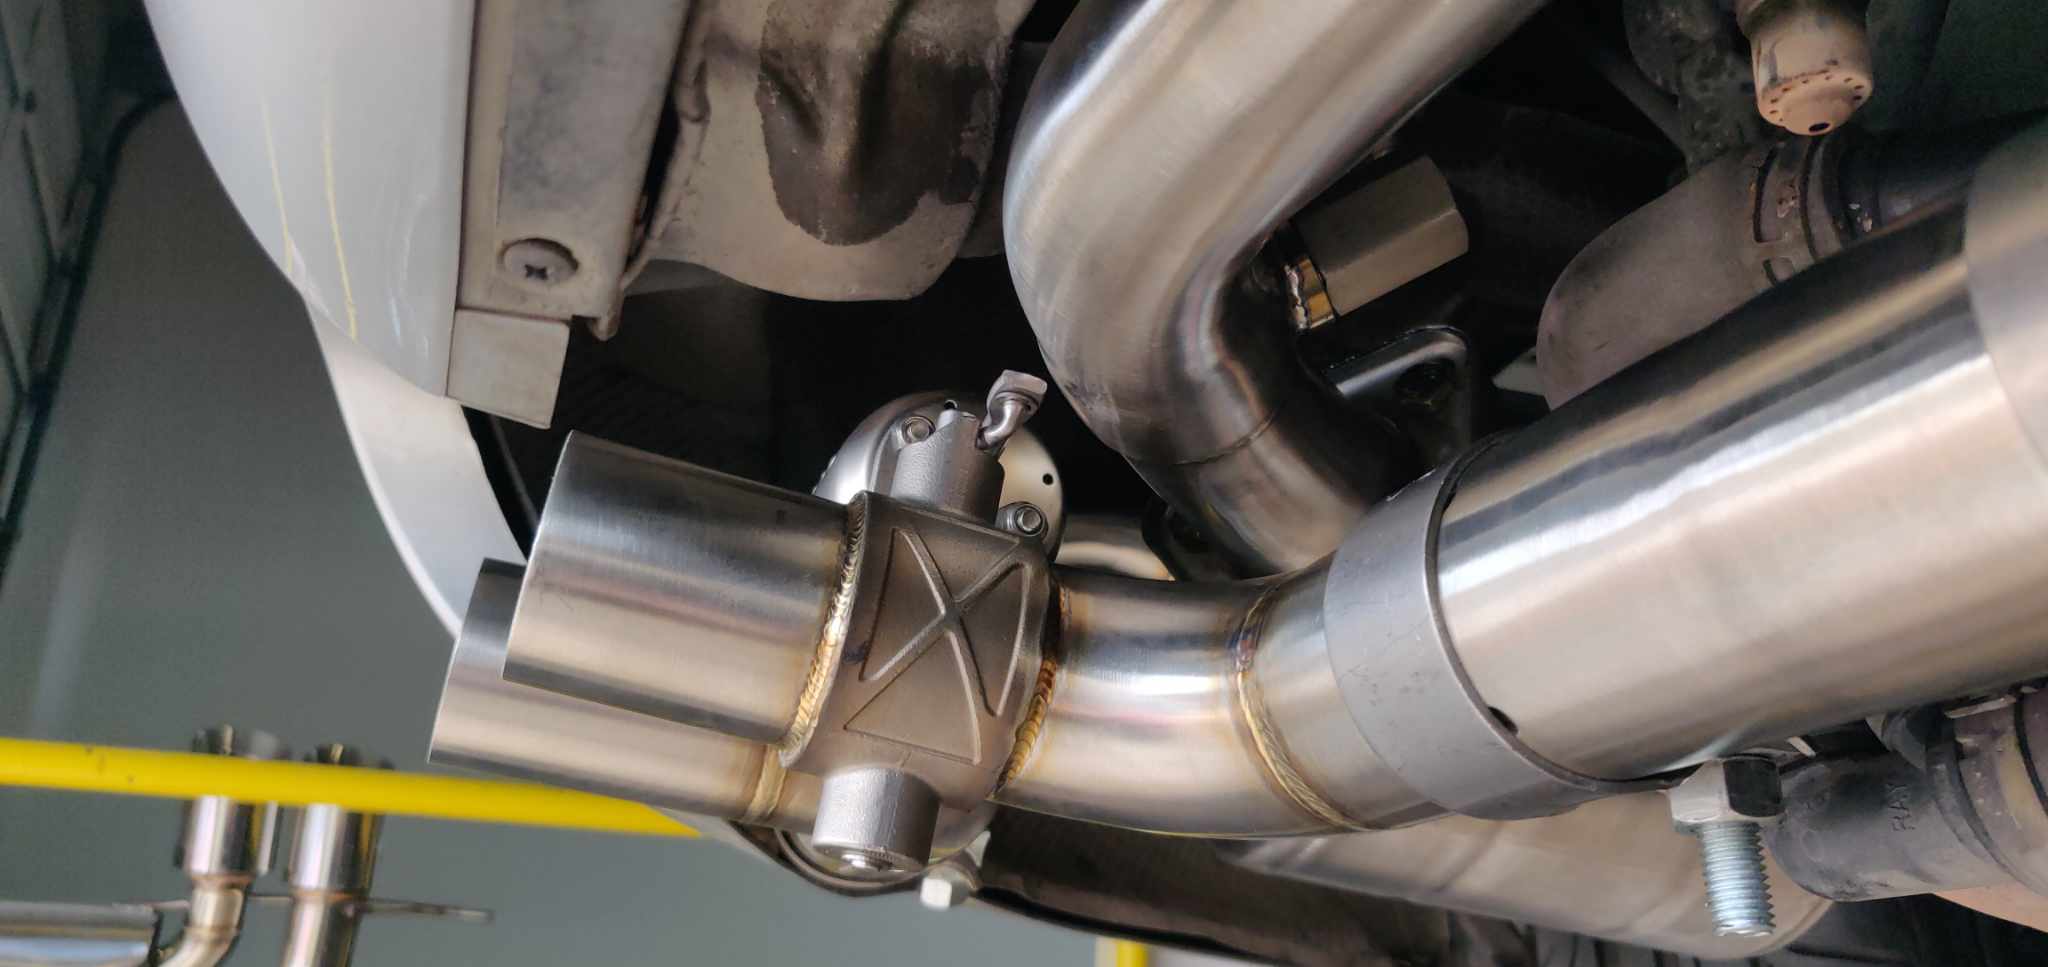
6. Using a Pry Bar inserted between the header and exhaust piping as illustrated, pry the muffler sections to the left on the driver's side and to the right on the passenger's side to ensure proper clearance space for the exhaust valve pivot to clear.
7. Once the exhaust valves are cleared of the exhaust piping, hold the pry bar in position firmly while another person tightens the 54mm exhaust clamps. Ensure the clamps are tightened adequately to leave a 1/4" minimum proper spacing for the exhaust valve to function correctly.
8. Repeat the same process for the other side.
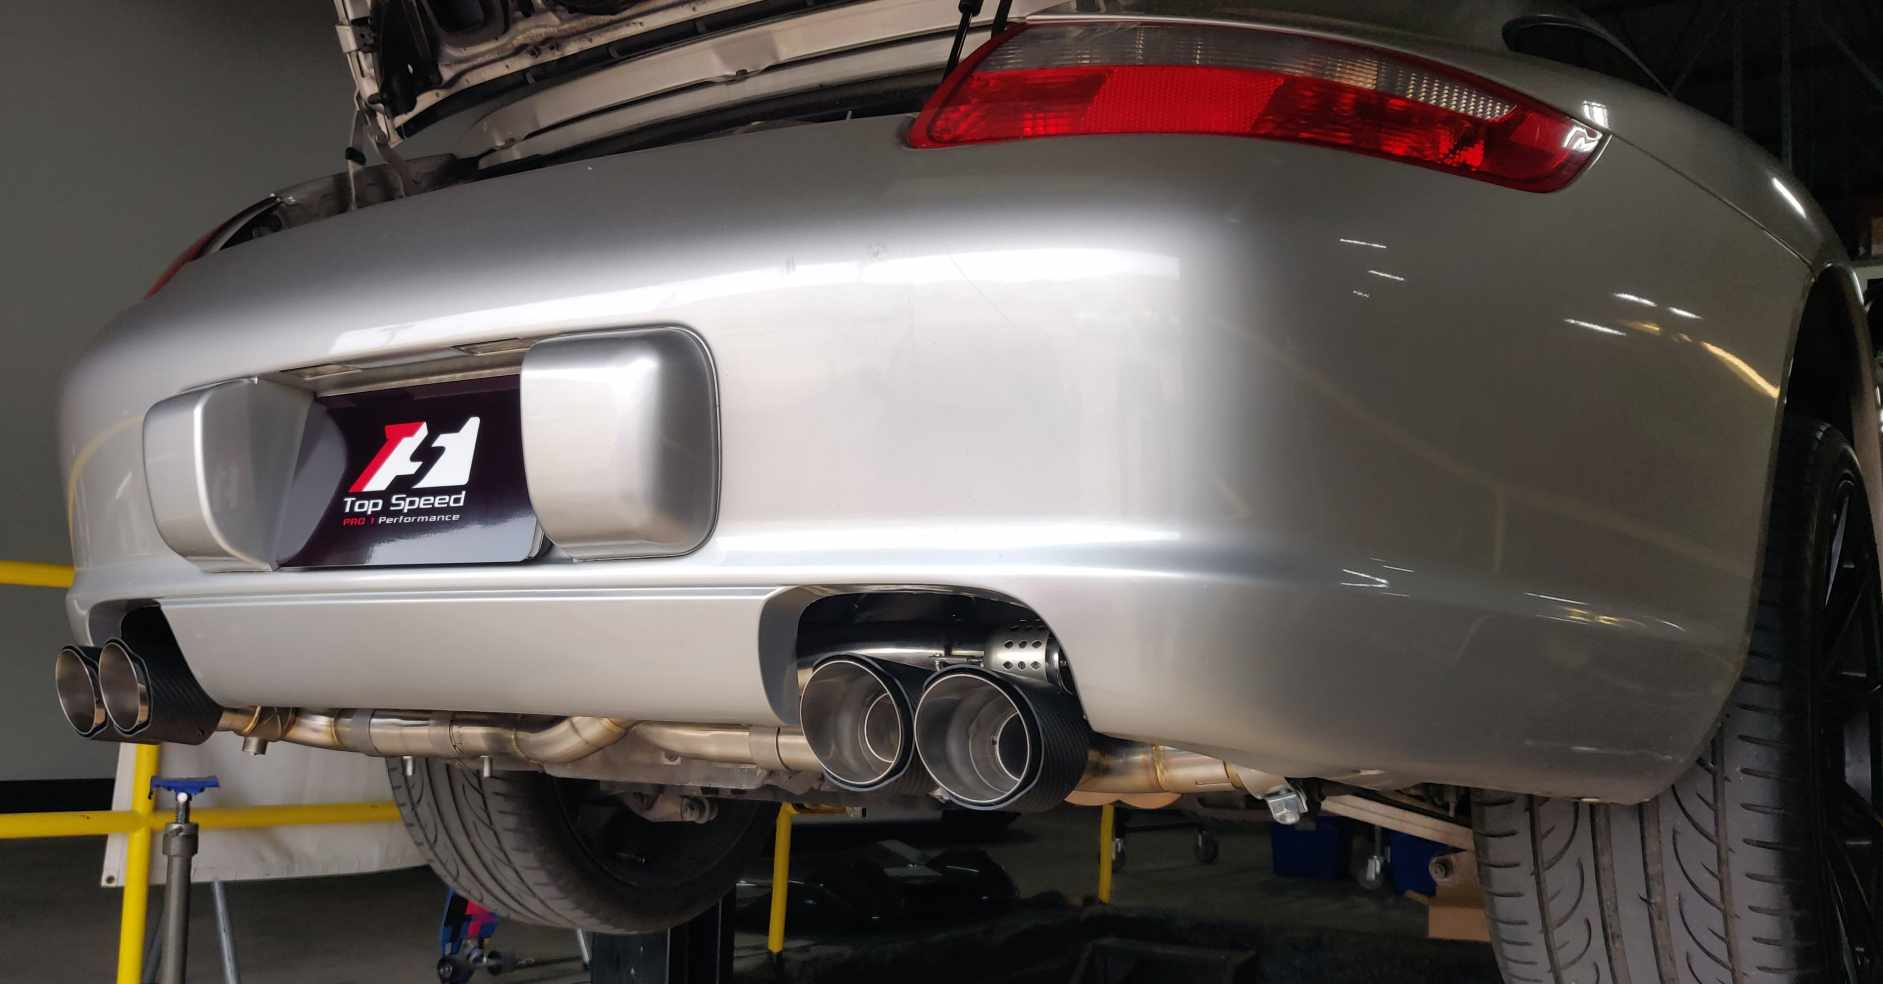
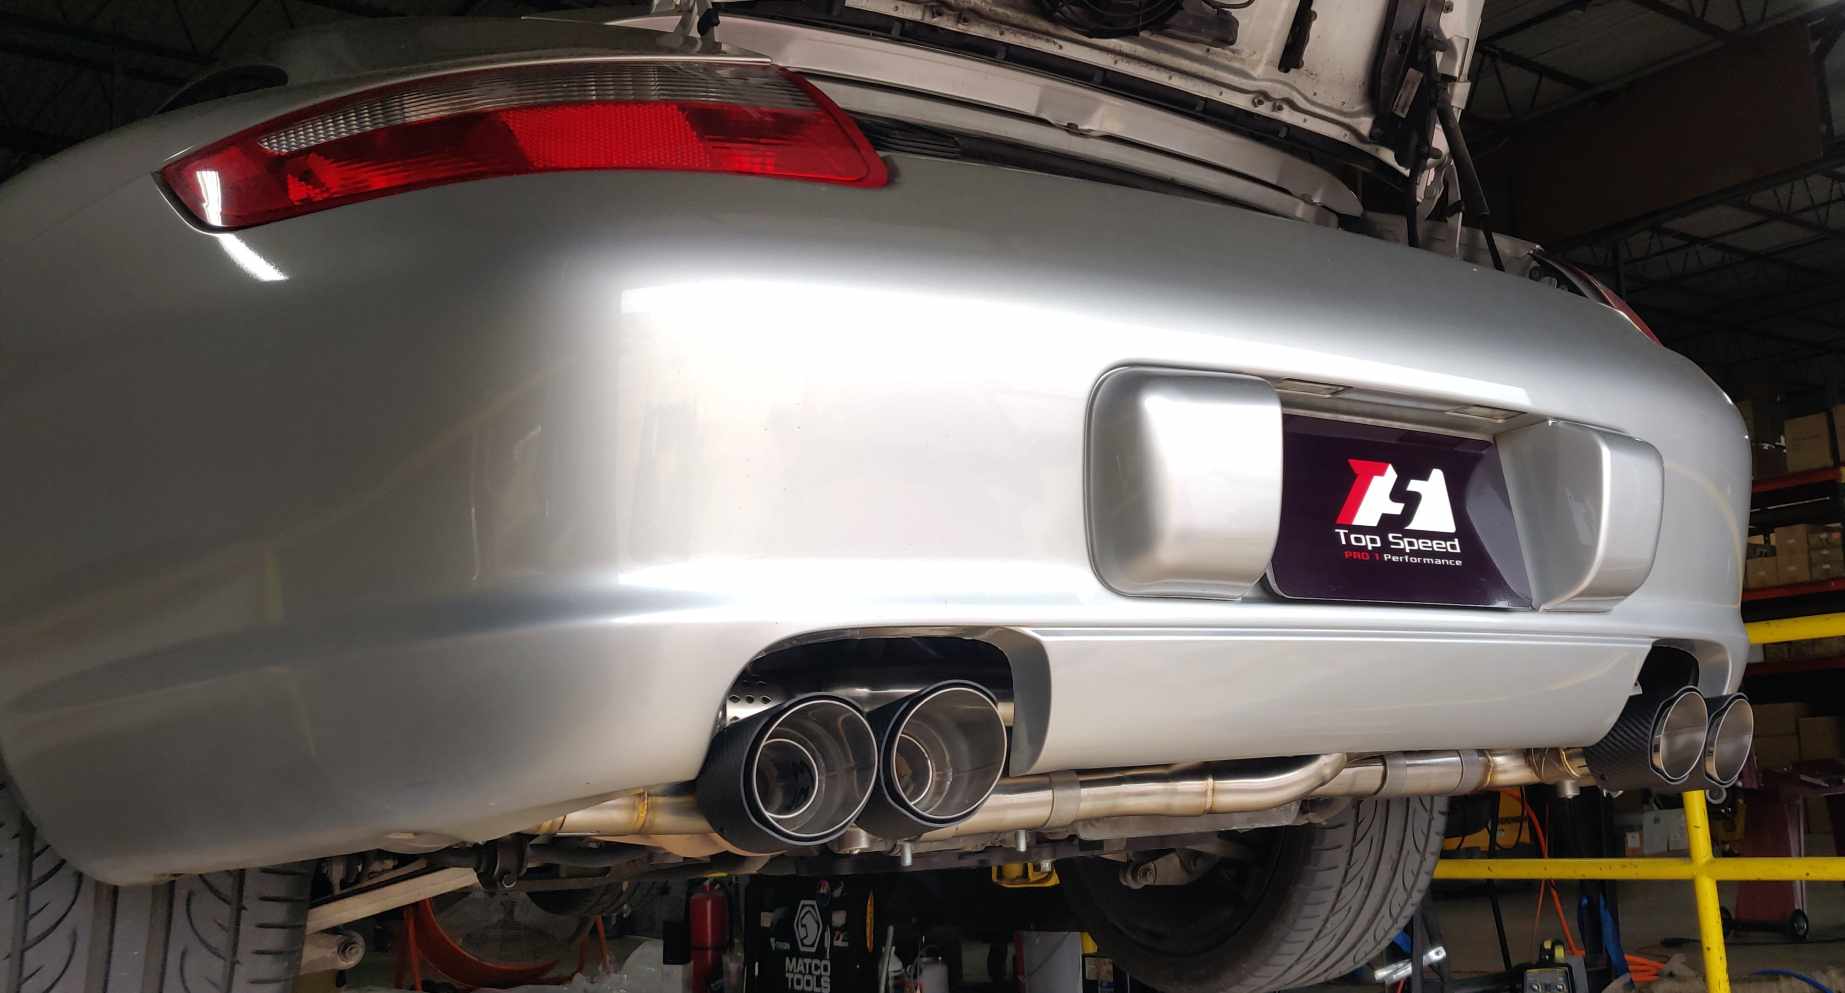
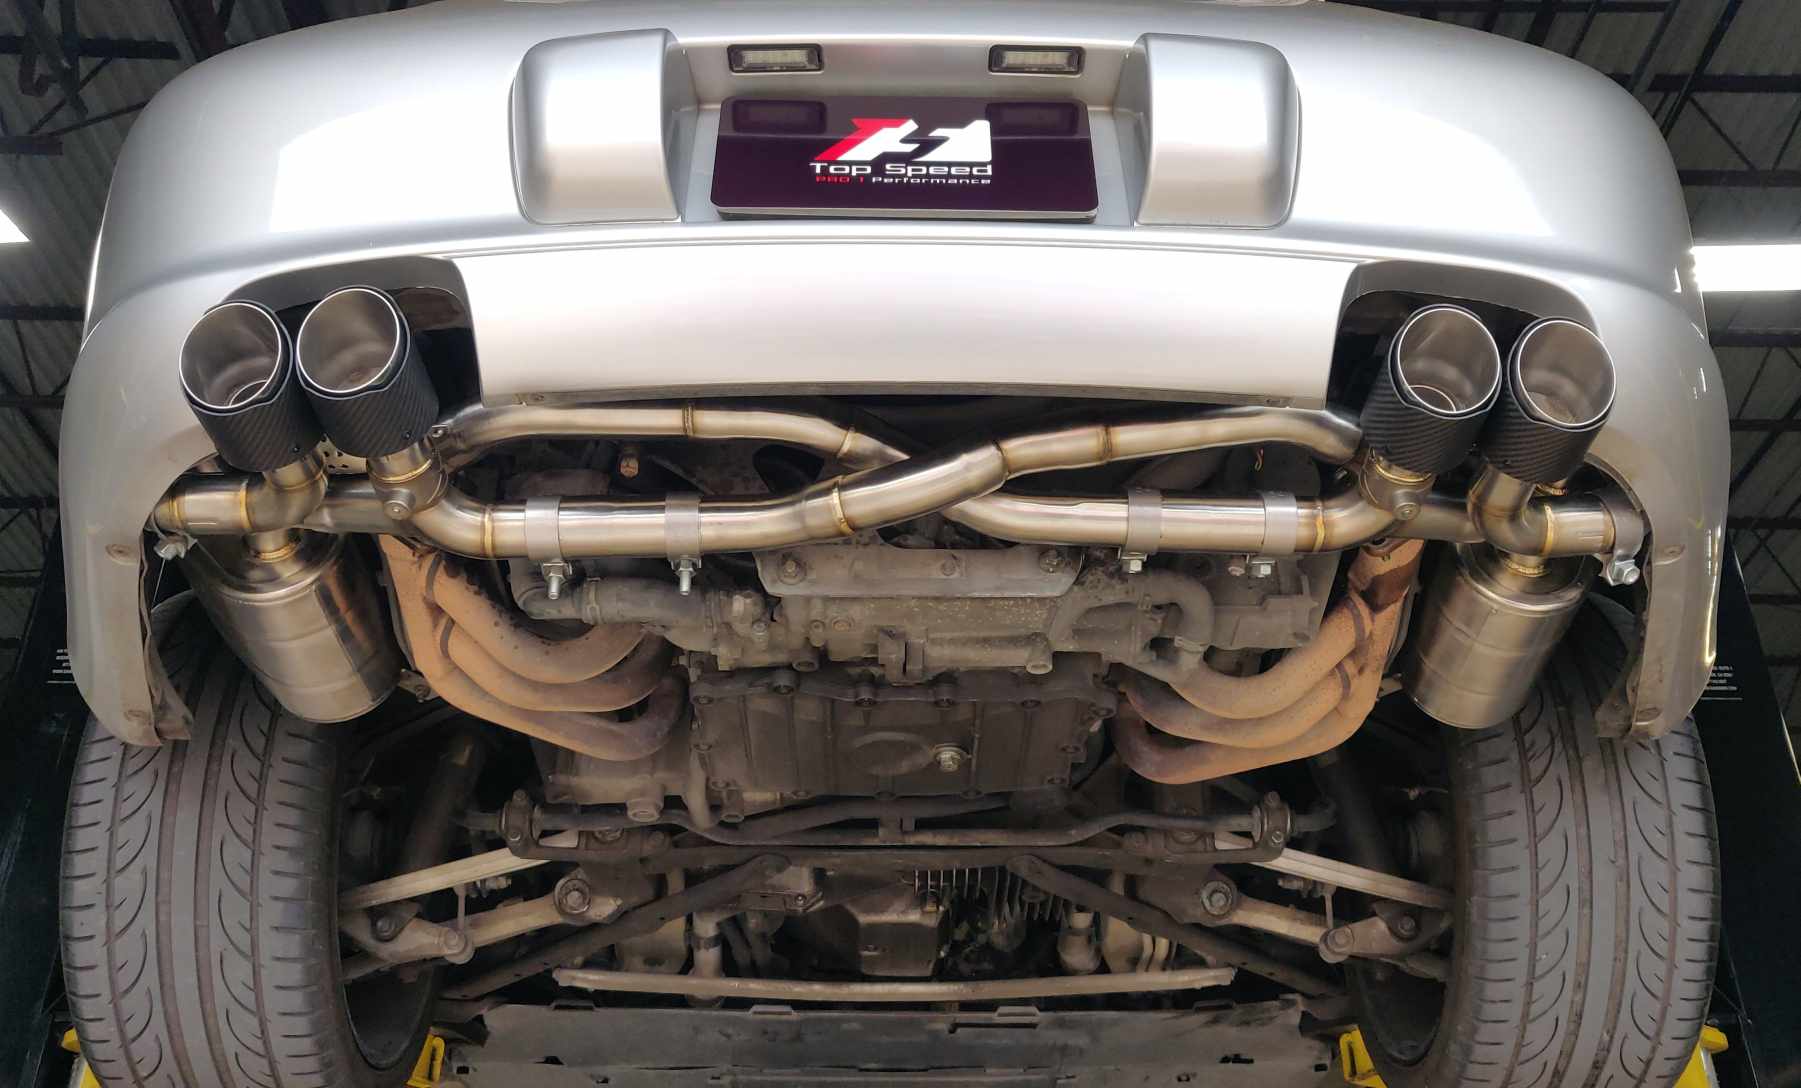
9. The final step is to install the carbon Fiber exhaust tips back on and adjust the exhaust tip's spacing and position, then tighten the 54mm clamps accordingly.

Technical Notes: This new exhaust is a catless design, which will require ECU Tuning or Adding Mechanical CEL Fix Adapter x 4 pcs (2 for Pre-Cat / 2 for After-Cat) to eliminate the check engine light due to the elimination of the factory catalytic converters.
Remote Control Valve Kit Installation:
1. Find a suitable location for the Exhaust Valve Actuator Box (Box are in Black depending on the production).
2. For power source, connect the wiring plug to the box and the other side cigarette socket plug into the cigarette lighter.
3. The vacuum hose connects to the Exhaust Valve Actuator Box vacuum tube. Run the silicone vacuum hoses using a T-Split Adapter to each side of the exhaust valves.
4. Ensure all silicone vacuum hoses are connected, and then start up the vehicle to test the exhaust valve remote to confirm the proper function of the exhaust valves.